iCopyAssistant can easily copy iPod to Mac and copy songs from iPhone to iTunes on Mac computer. iTunes can only sync songs from the local Mac computer to iPod, iPhone or iPod Touch, but sometimes we need to copy songs from iDevices such as iPod, iPod Touch and iPhone/iPad to Mac computer to rebuild the iTunes library, or we want to A brand new computer on which the iTunes library is built. iCopyAssistant can do things that iTunes can't, transfer songs from iPod to Mac computer and rebuild iTunes library. In addition, iCopyAssistant will rebuild the lost playlist and music track metadata into the new iTunes library together.
Download the iCopyAssistant
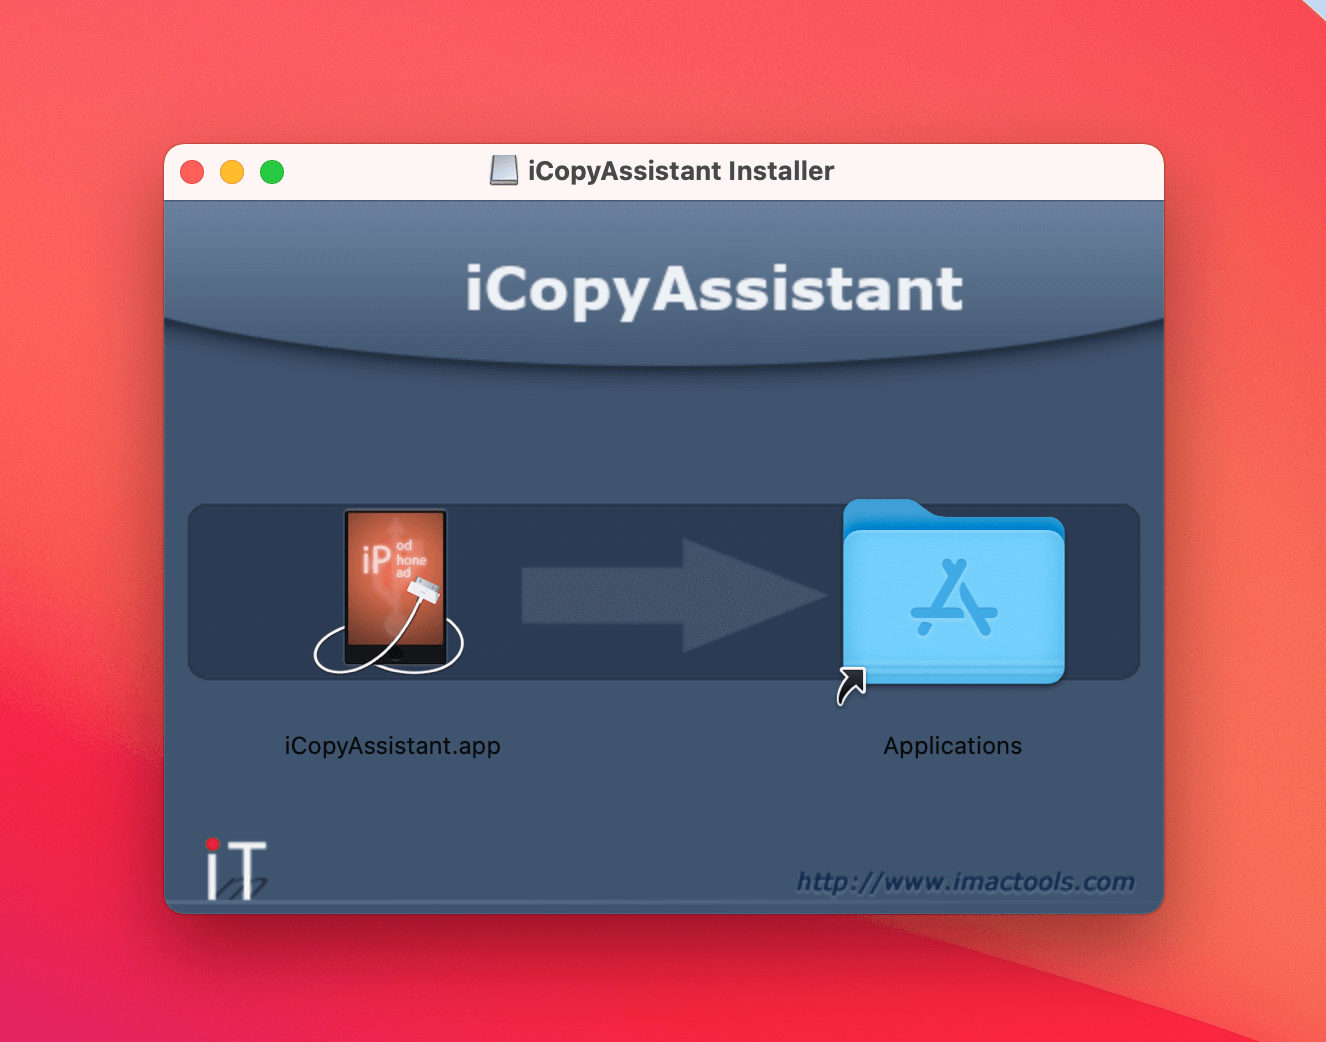
Download the latest version of iCopyAssistant from download page. Find installer file "iCopyAssistant.dmg", double click the file to open and mount the installer, then you'll see:
Install and Run iCopyAssistant
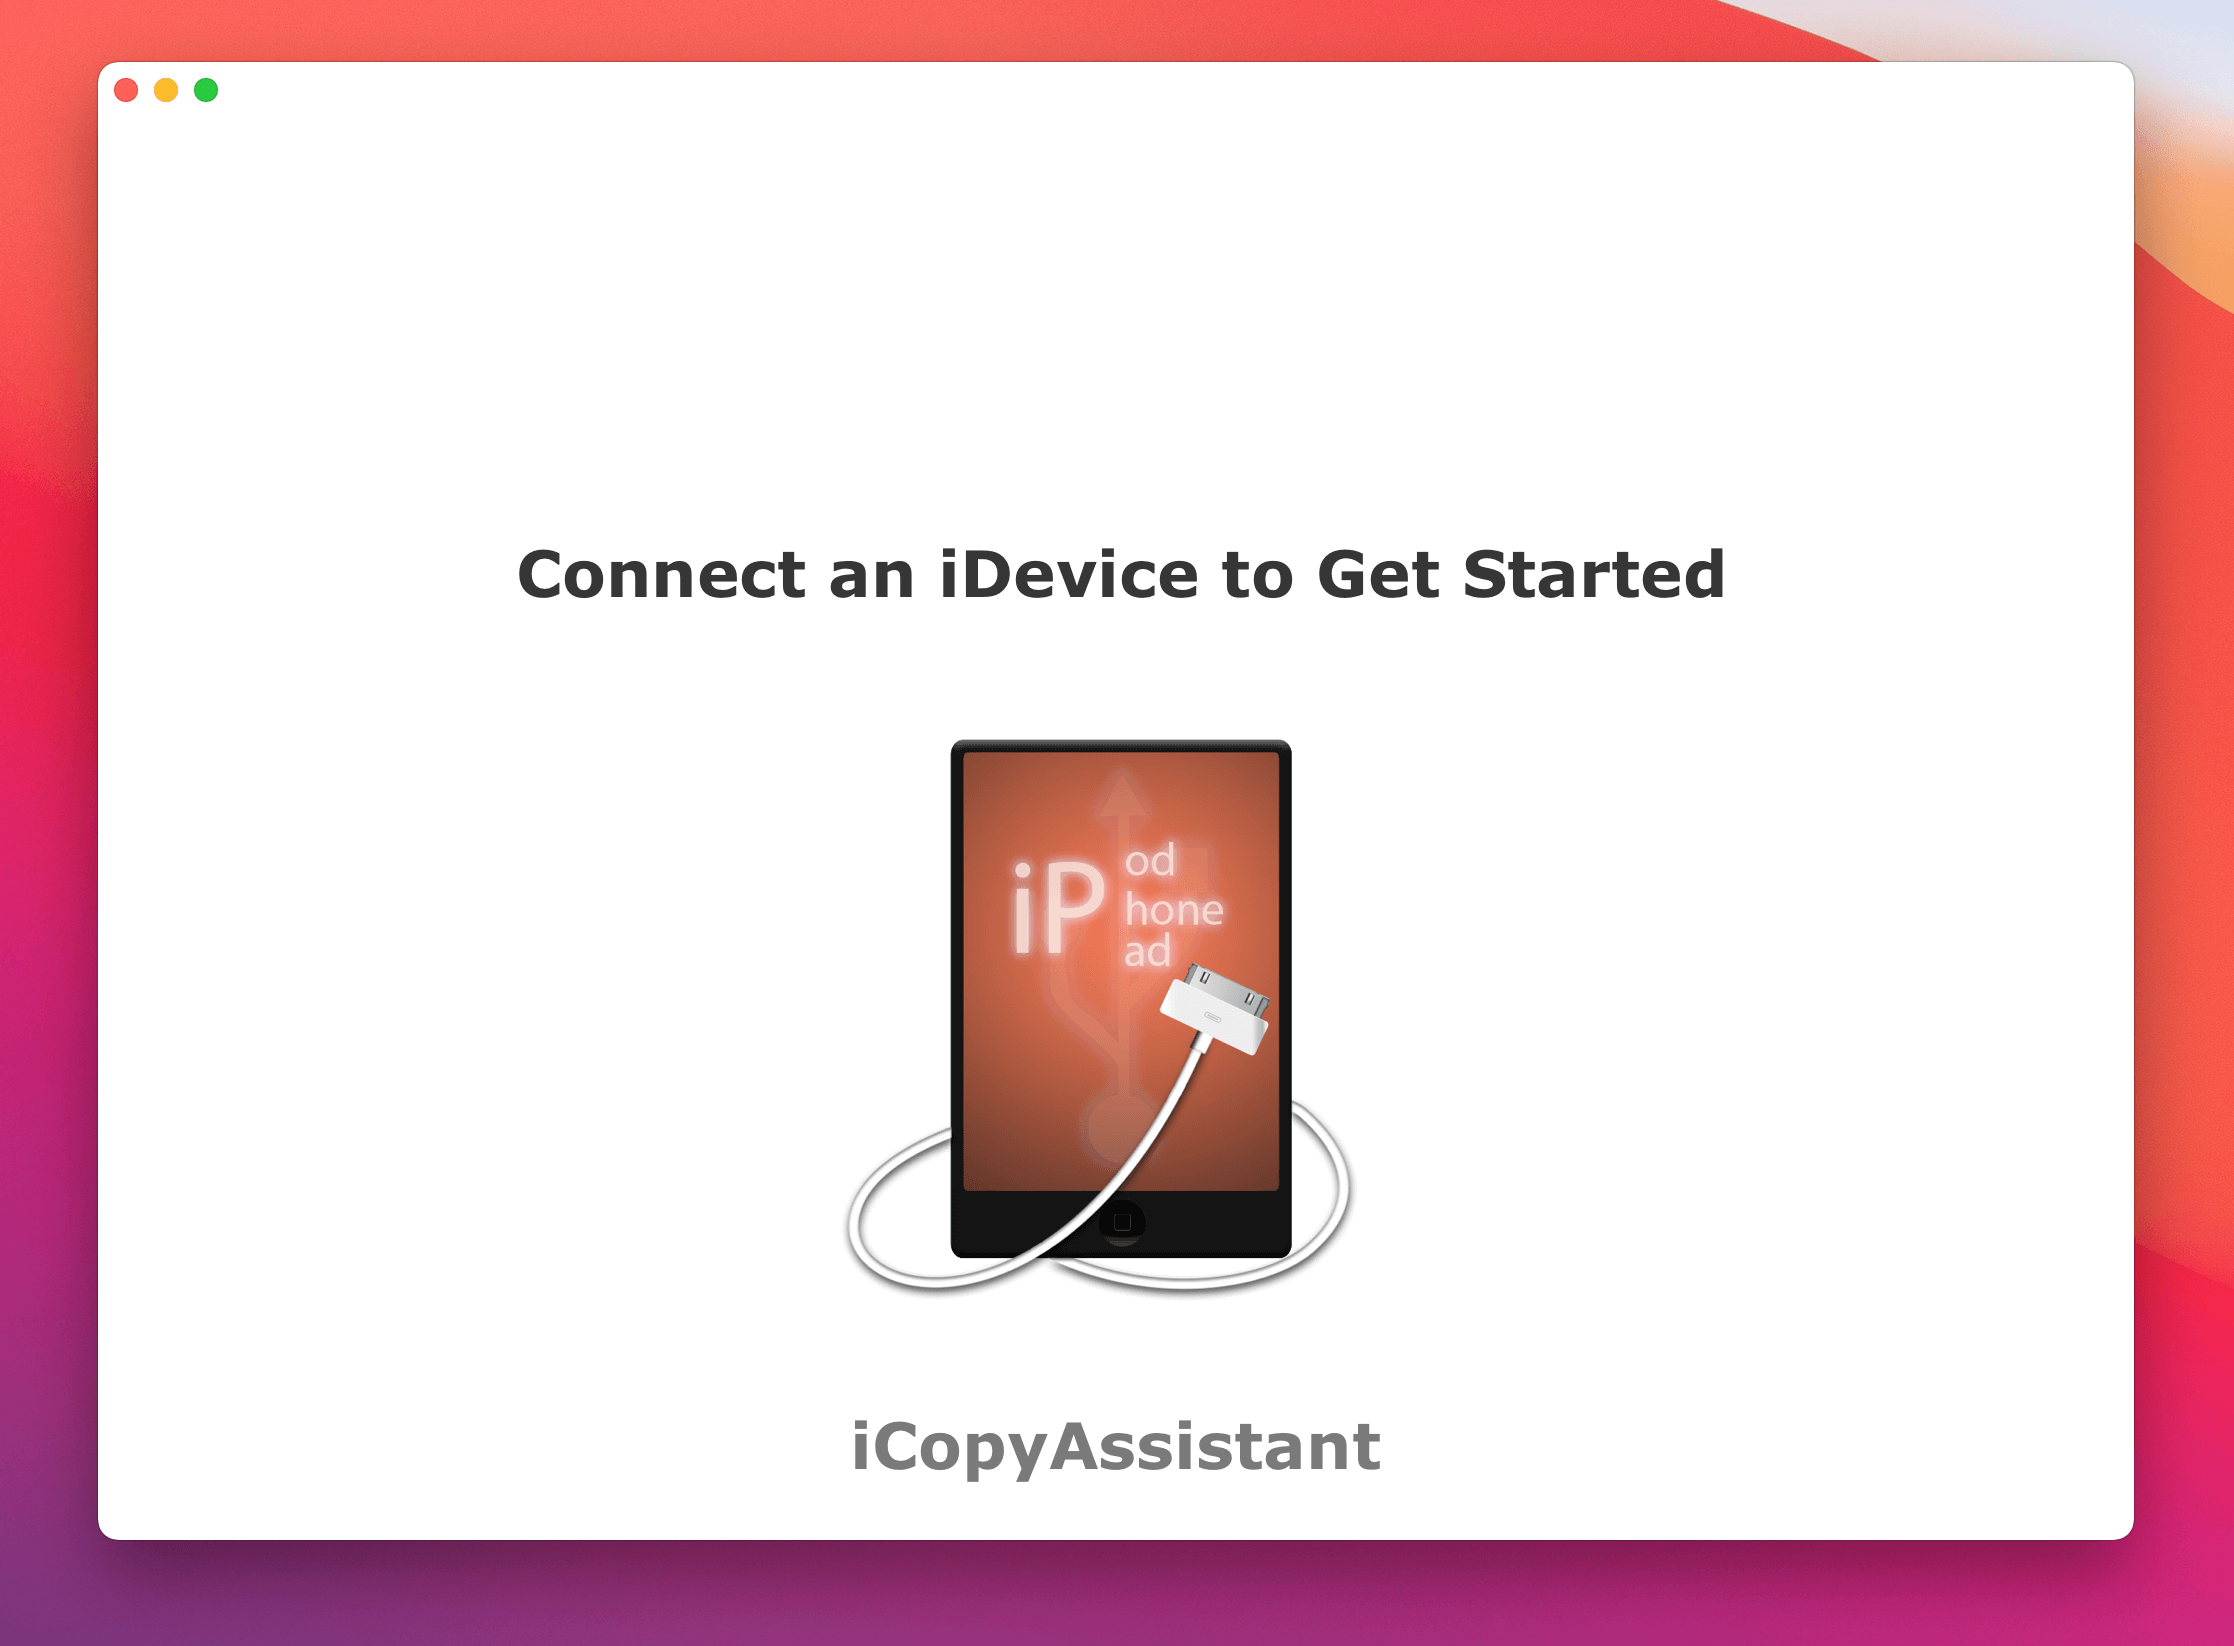
Drag the icon "iCopyAssistant.app" over "Applications" to finish installation. Then, run the application, if there is no iPod or iPod Touch or iPhone / iPad connected to Mac computer, you will see the main window looks like below
Guide to User Interface
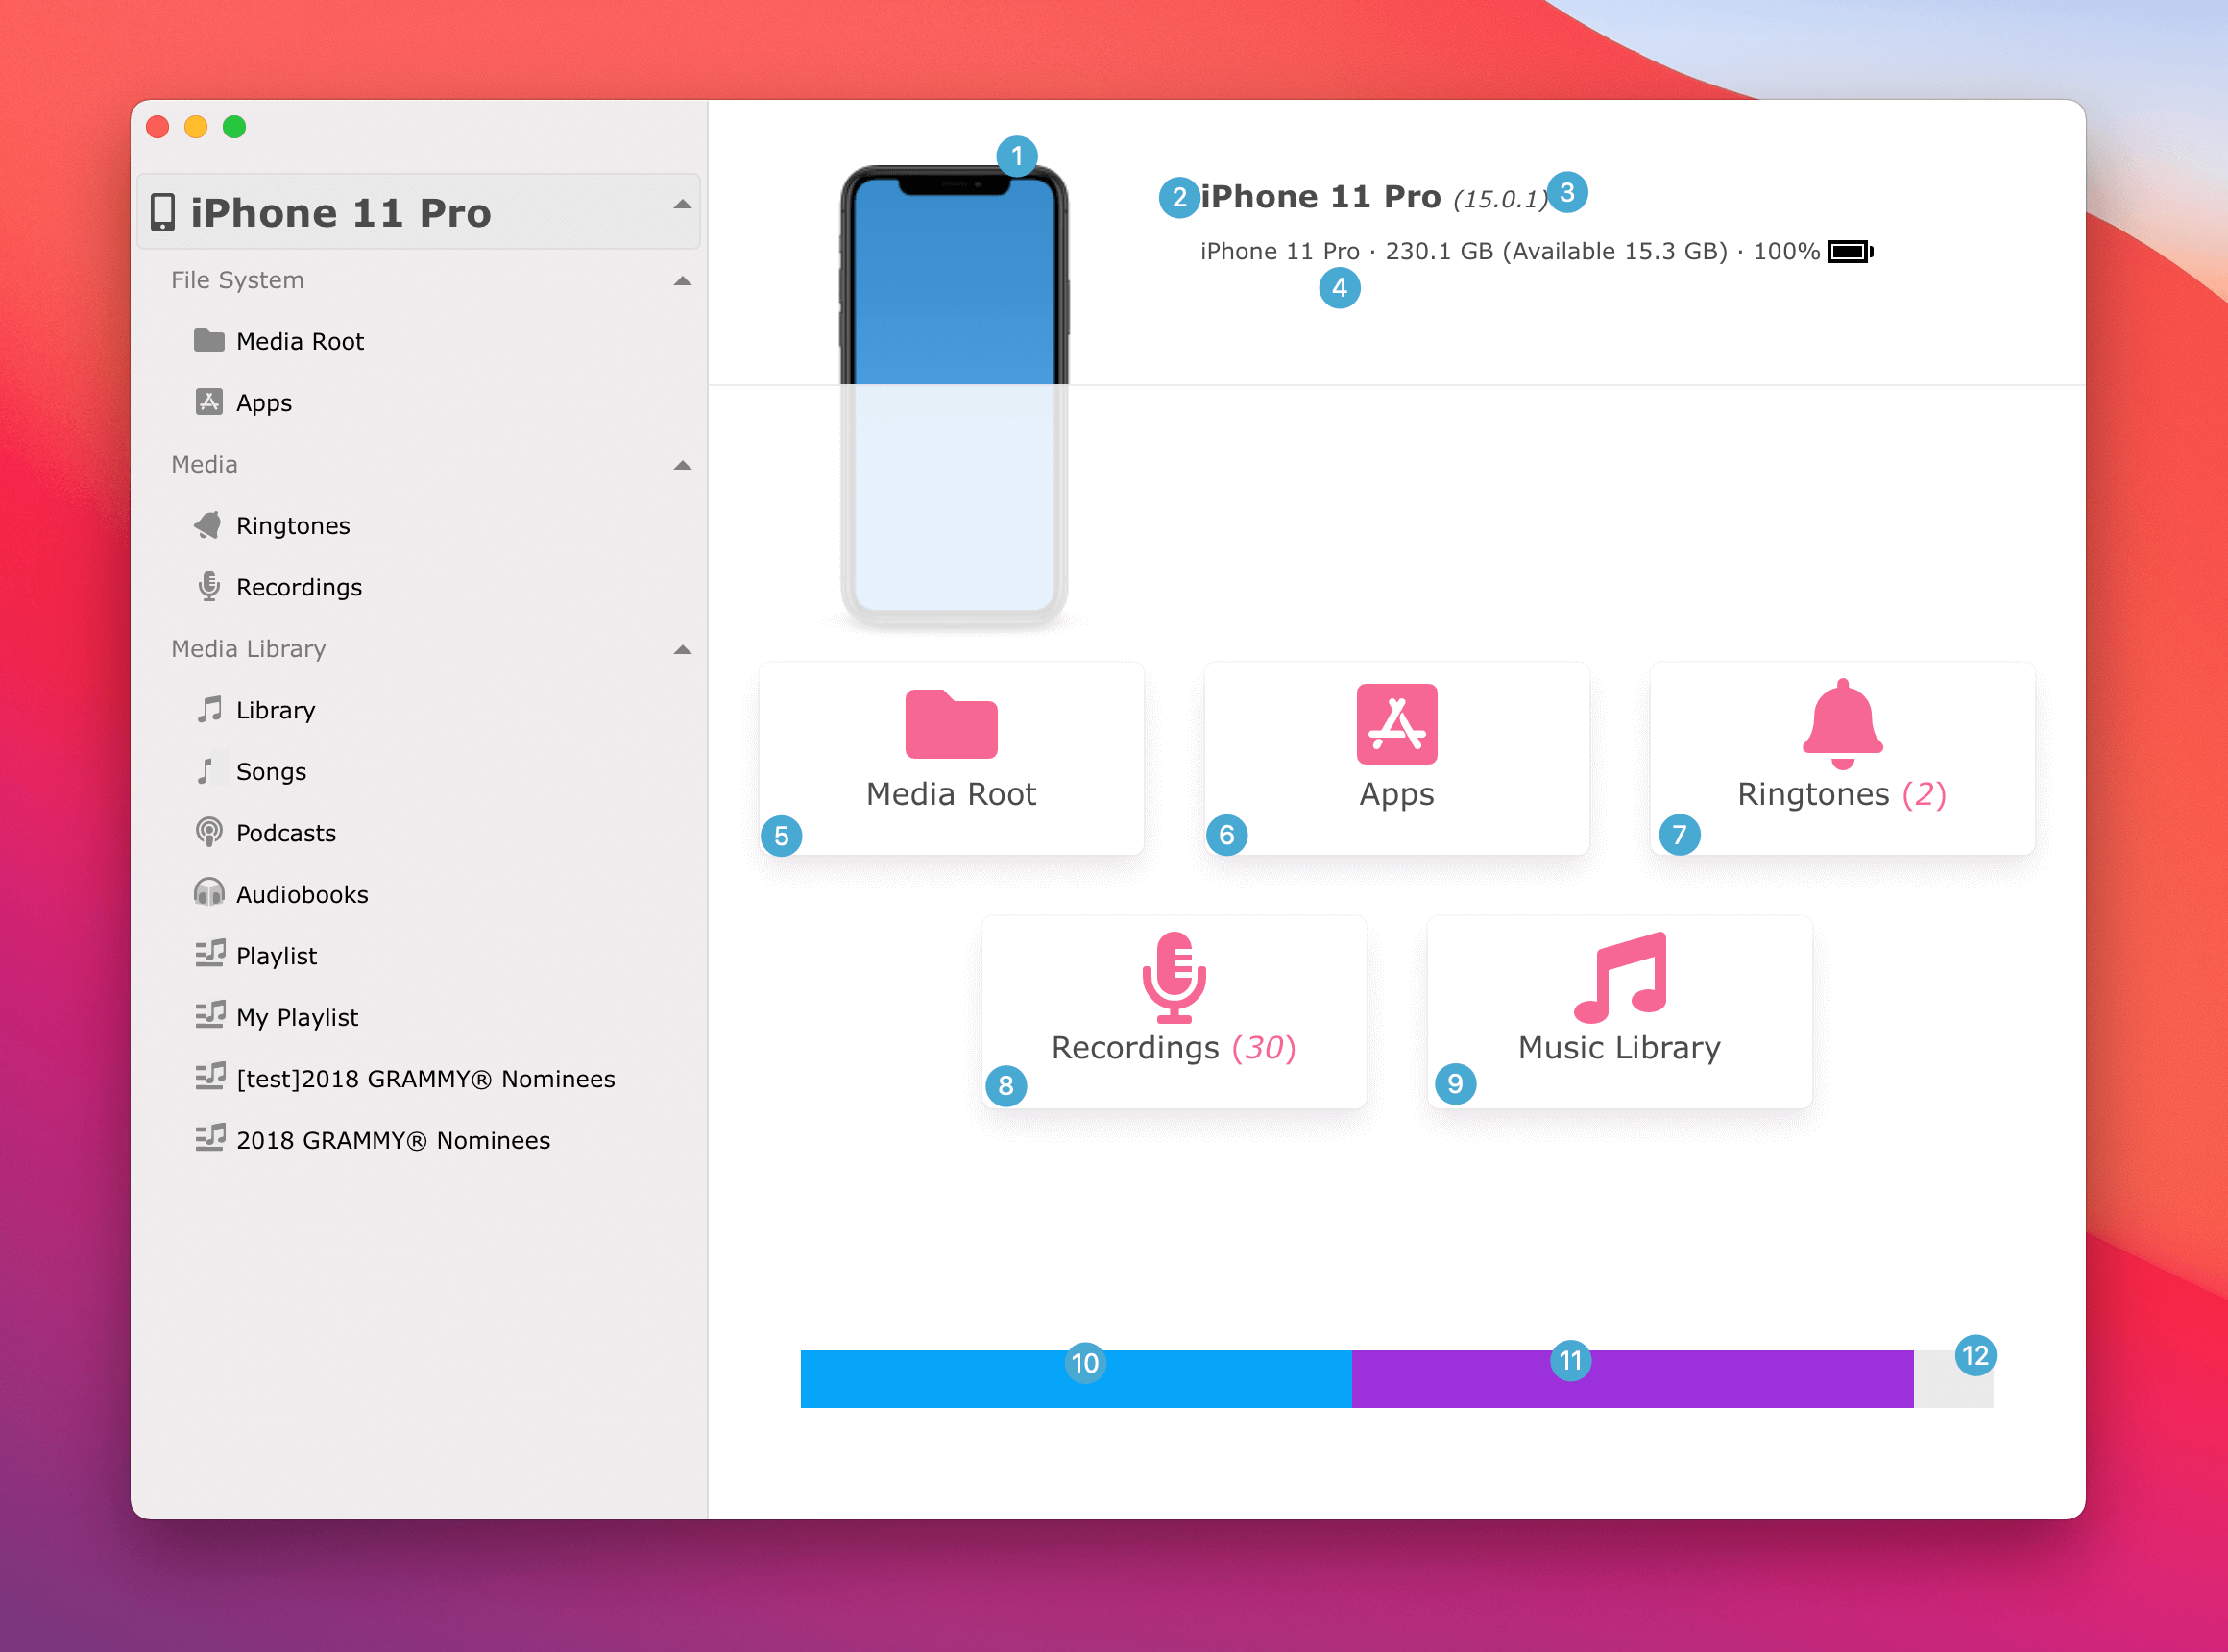
Connect any iOS device (iPod Touch, iPhone, iPad) or iPod to the Mac computer, iCopyAssistant will load all the content on the iPhone and display a summary of the information.
Device Information
This screen shows information about the device and storage info about media on iPod / iPhone /iPad.
- Features:
- 1 Picture of the iOS device, here shows the iPhone 11 Pro image.
- 2 Name of the iOS device.
- 3 iOS version of the device, or firmware version of iPod.
- 4 Important hardware information, including storage capacity, serial number, battery, IMEI, etc. Click to change different information.
- 5 Shortcut to root of the media file system
- 6 Shortcut to root of install Applications (only available on iOS devices)
- 7 Shortcut to ringtones (only available on iOS devices)
- 8 Recordings (aka Voice Memos, only available on iOS devices)
- 9 Go to Music library (iTunes library)
- 10 Storage spaces occupied by Photos.
- 11 Storage spaces used by other data
12 Free storage space left on the device.
Learn how to transfer files from iPhone to Mac computer
Learn how to set a song as ringtone on iPhone
Media File System
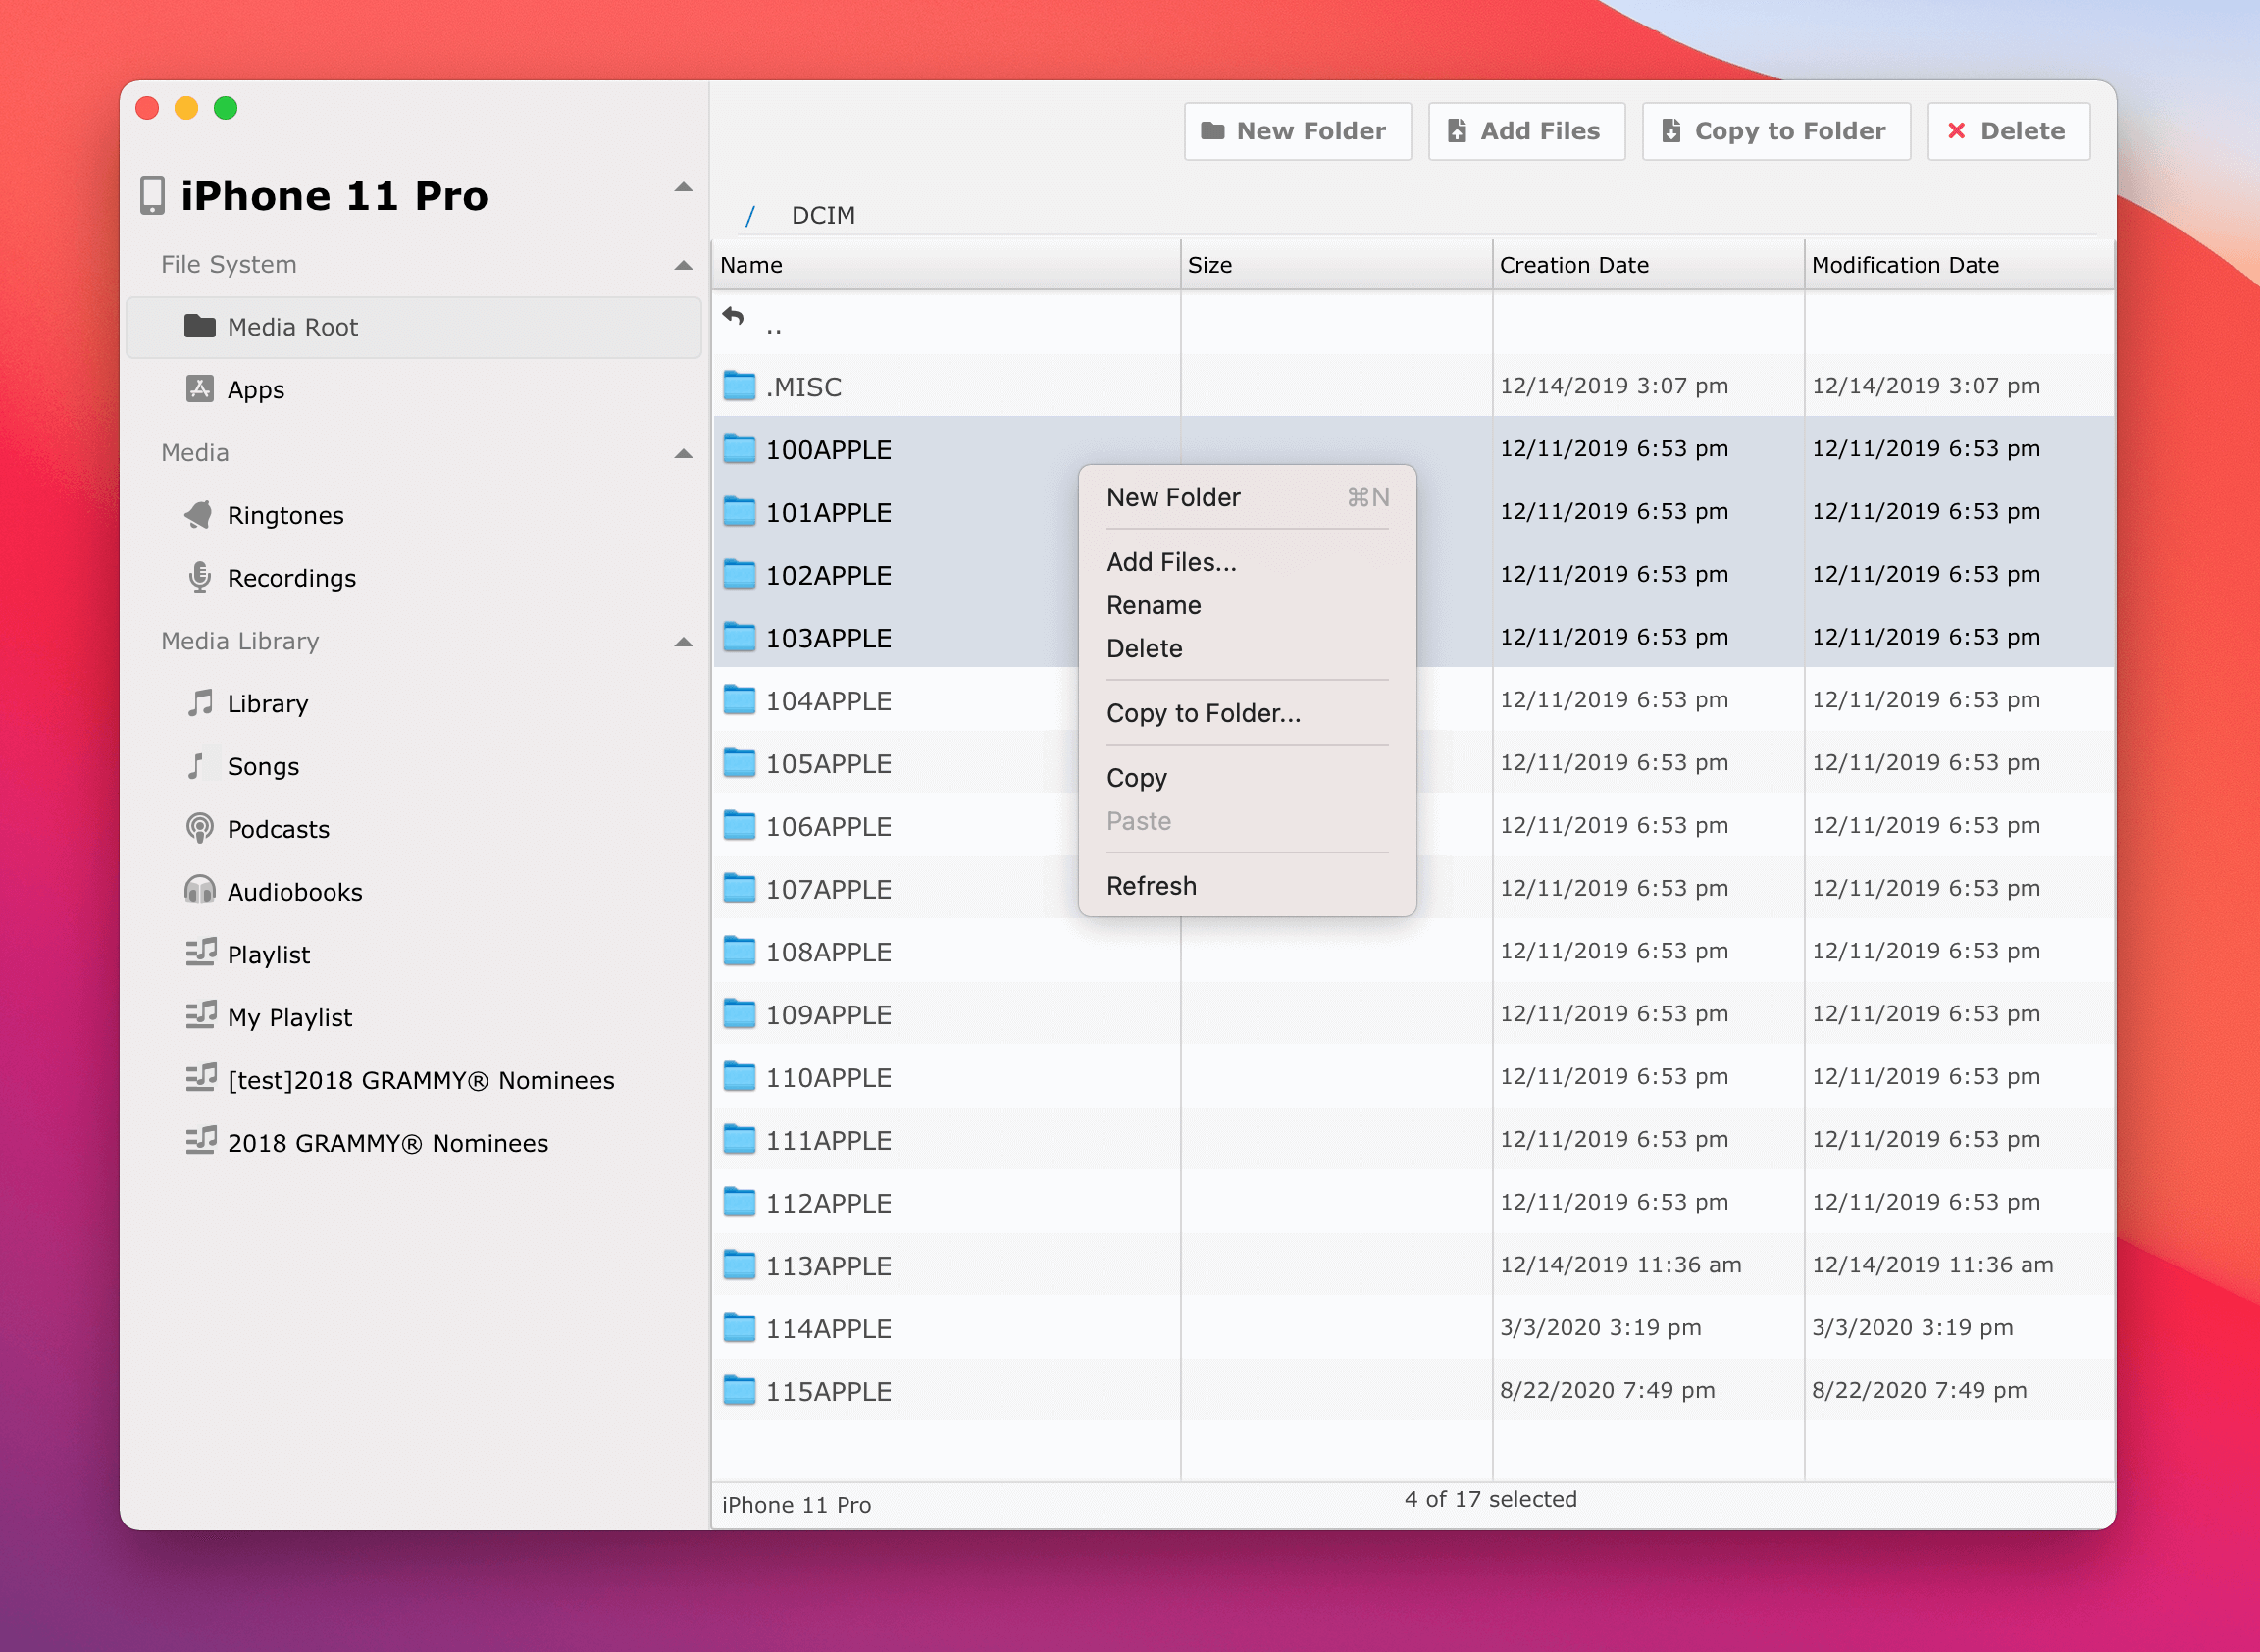
Right click to show the context menu.
Apps Files
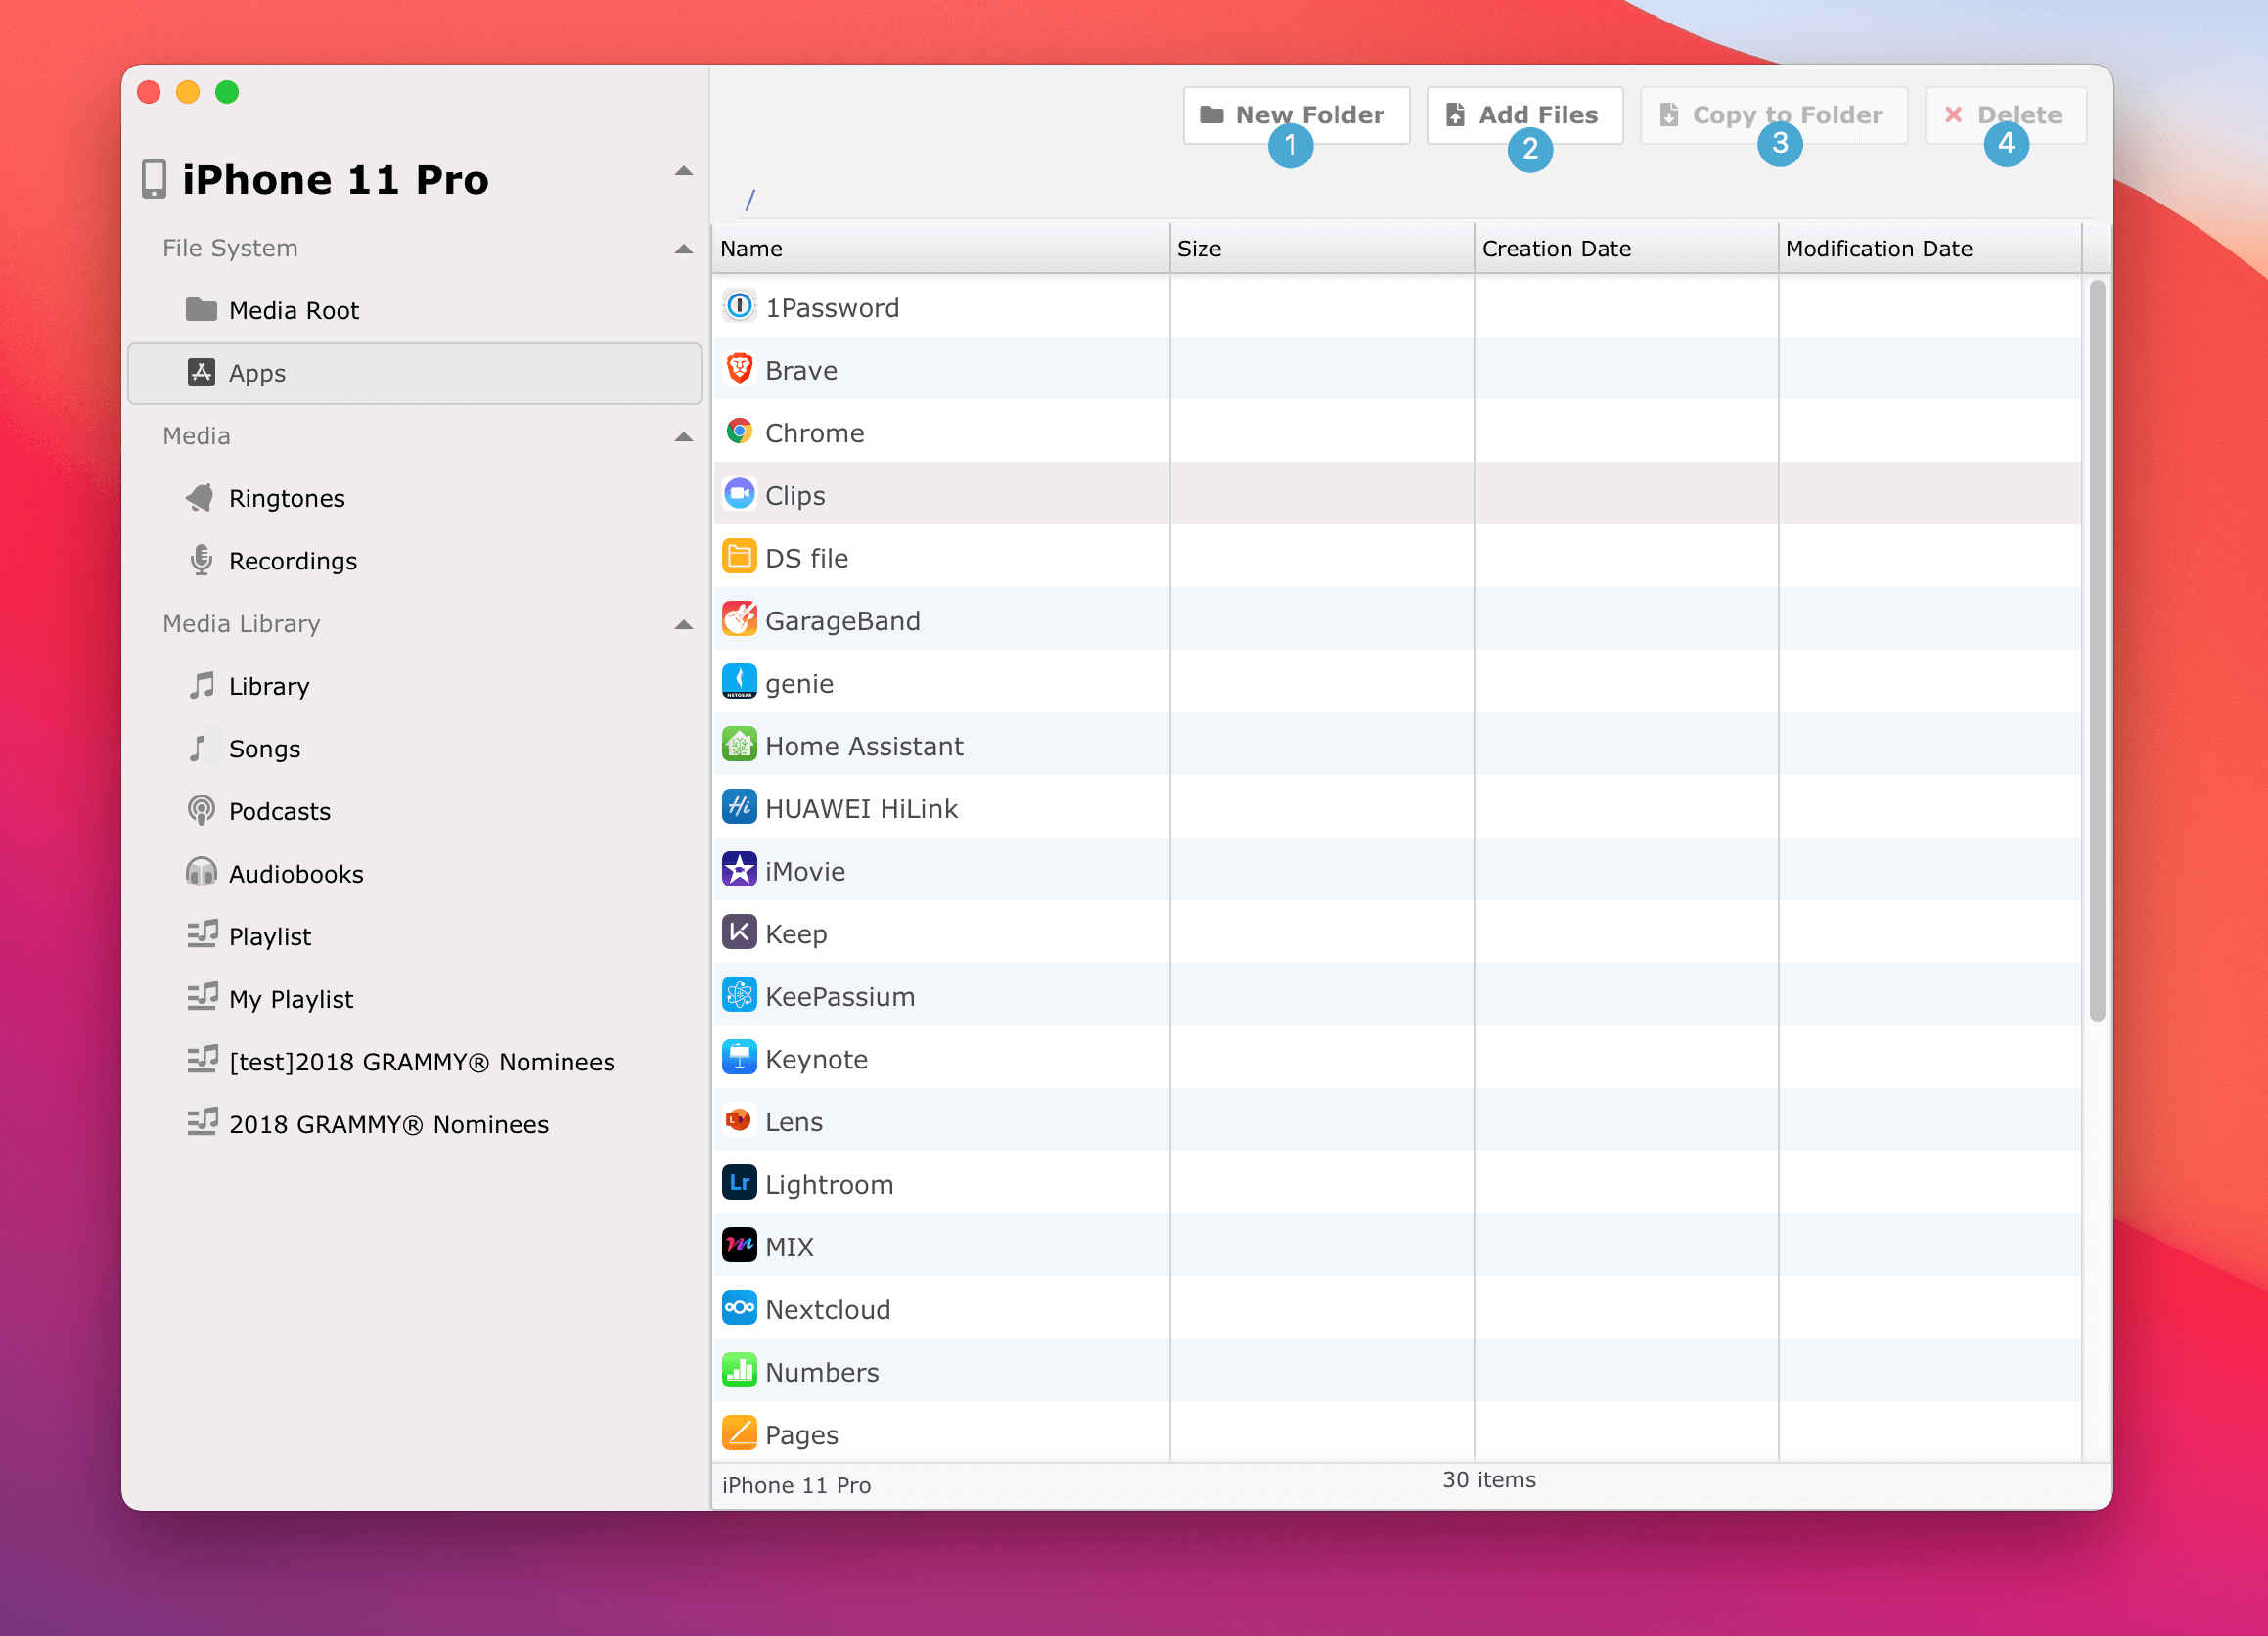
- Button actions:
- 1 "New Folder" - Create a new folder on the device
- 2 "Add Files" - Copy files from computer to the device
- 3 "Copy to Folder" - Copy files from the device to folder on computer
- 4 "Delete" - Delete the file on device (NOTICE: this operation is not recoverable, please be carefully)
- 5 "Rename" - Rename folder or files on device (ATTENTION: incorrect operation may harm software system)
- 6 "Copy" - Copy the files to clipboard, which can be pasted into other folder on the device or to another device.
- 7 "Paste" - Transfer the files in clipboard from computer system and copied from other devices.
- 8 "Refresh" - Refresh the file list
Music Library on Device
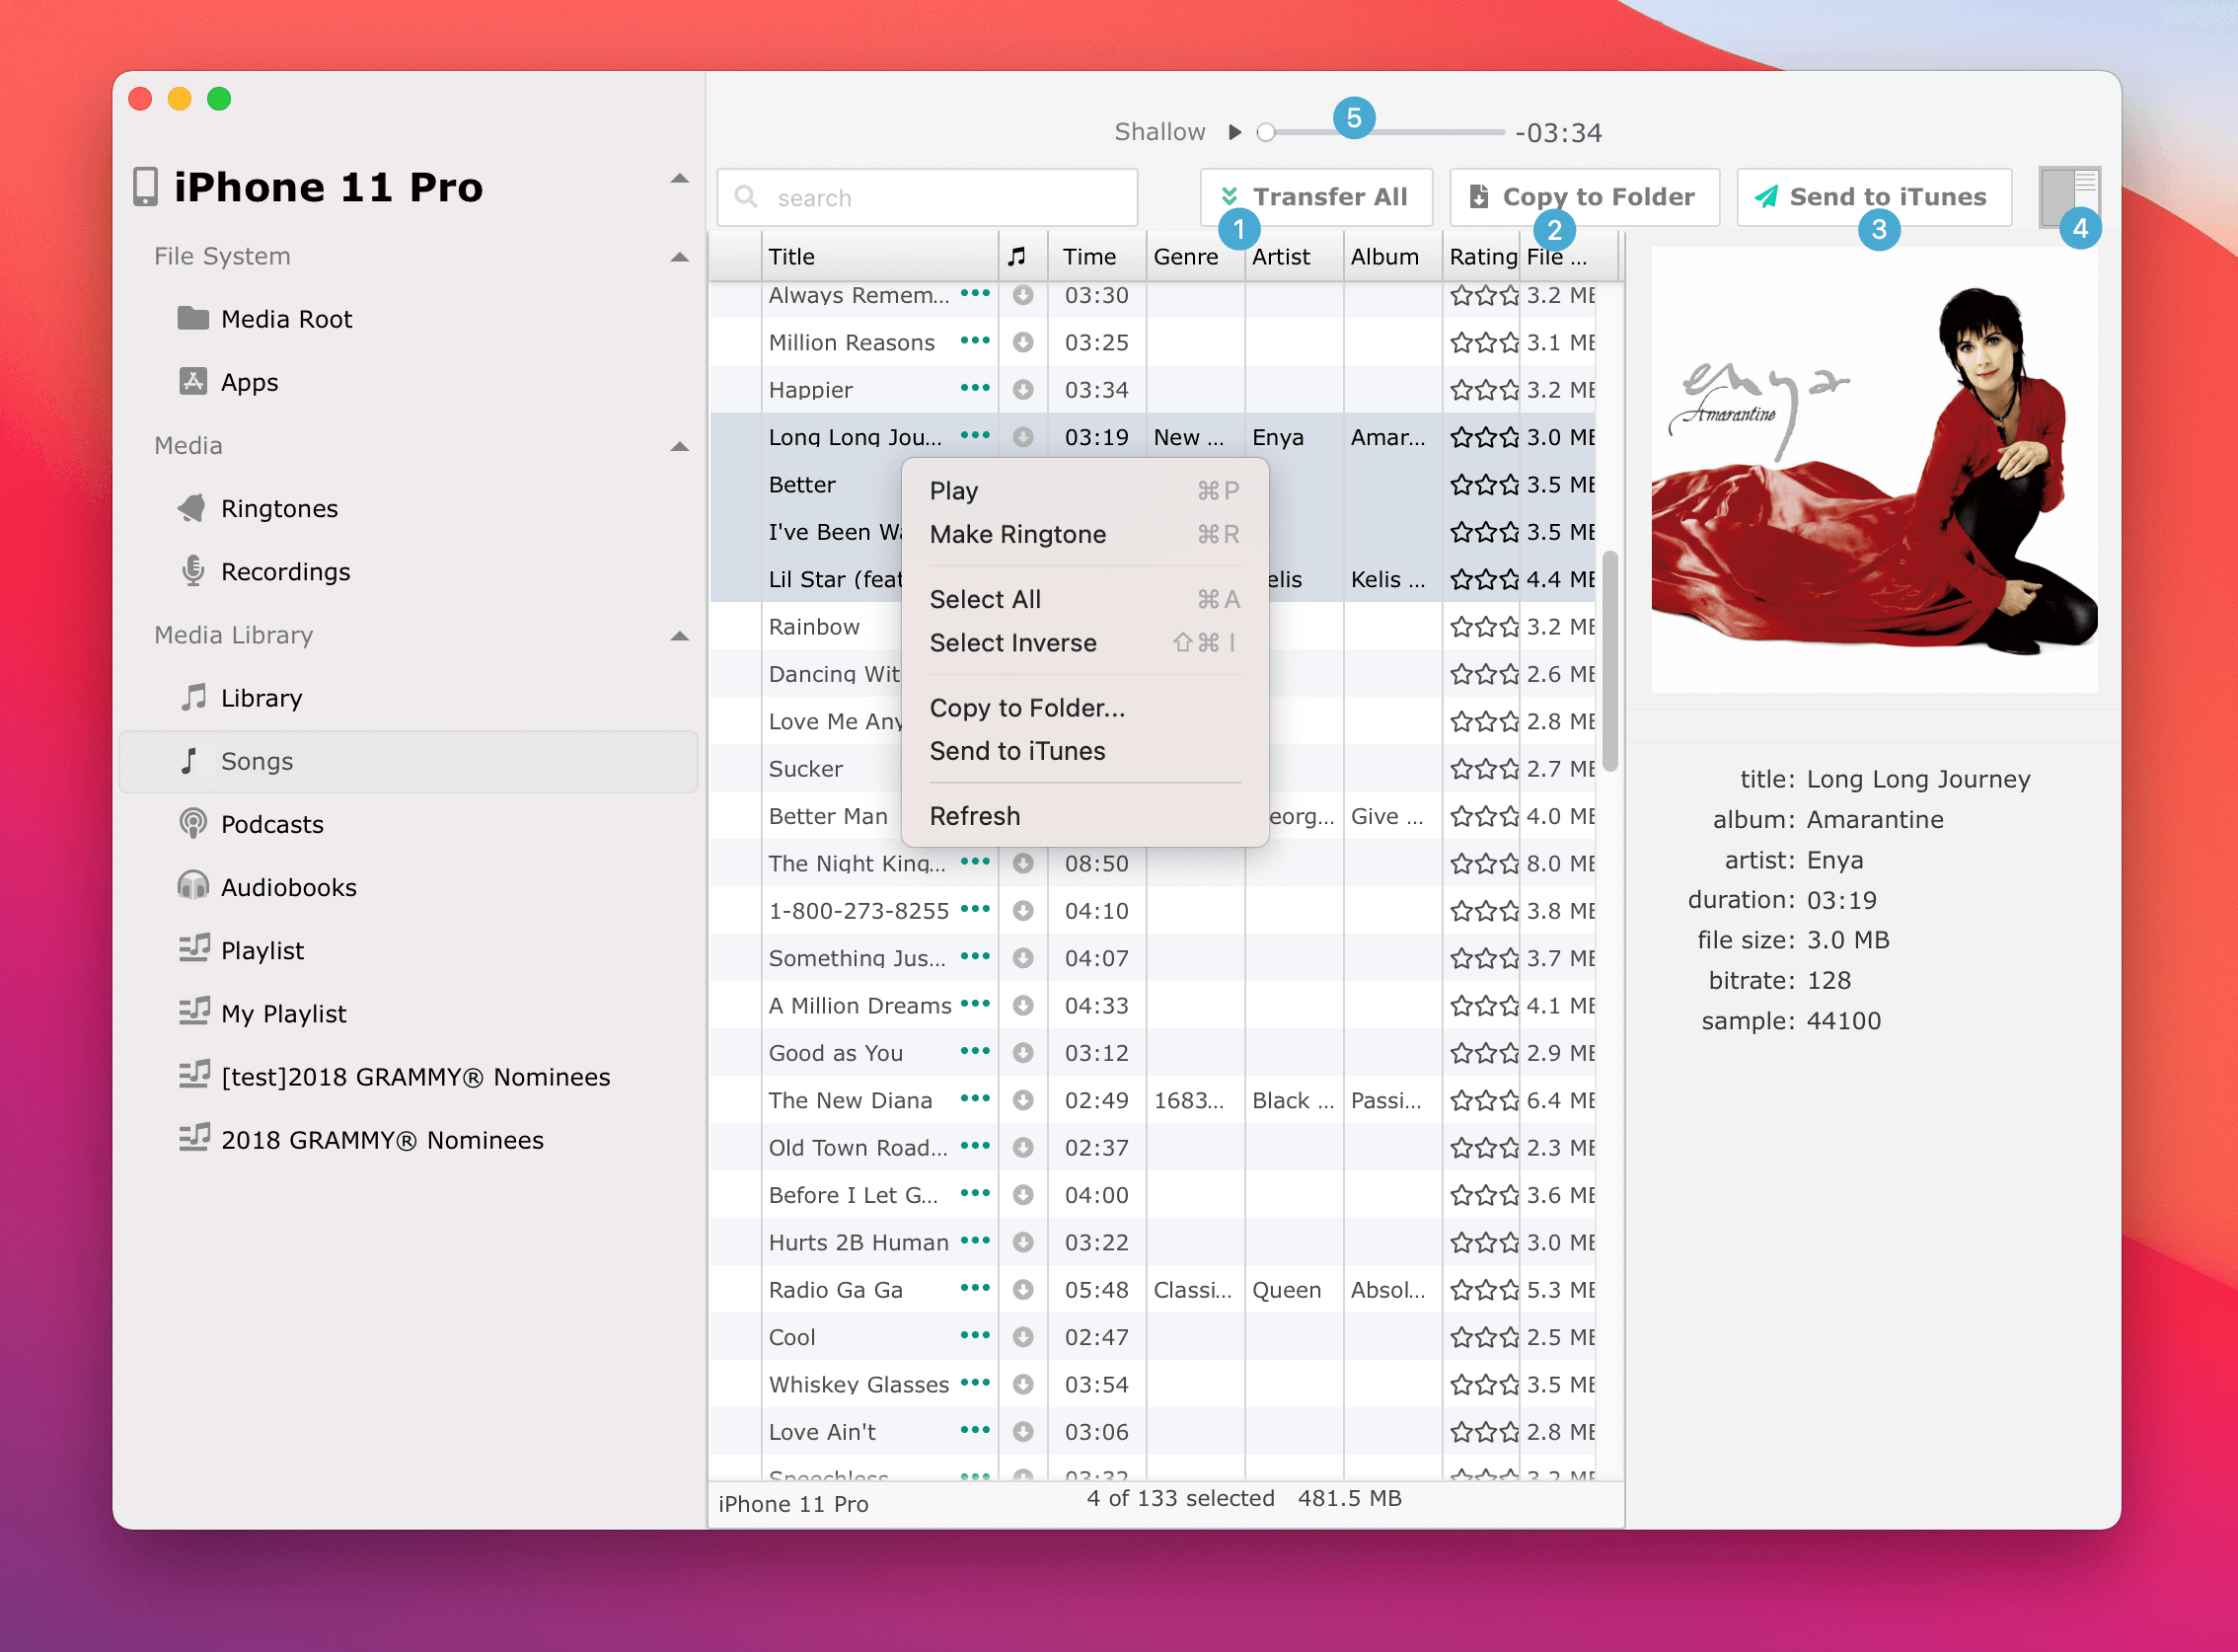
- Button and menu actions:
- 1 "Transfer All" - Copy files of selected tracks or all tracks under current playlist to folder on computer, the transfered files will be organized by predefined structure (Set in Preferences)
- 2 "Copy to Folder" - Copy selected tracks to folder on computer
- 3 "Send to iTunes" - Copy the selected tracks to computer and add to local music library, Learn how to transfer music from iPhone to Mac
- 4 "Show / Hide Info" - Toggle information of the selected track
Preferences
General
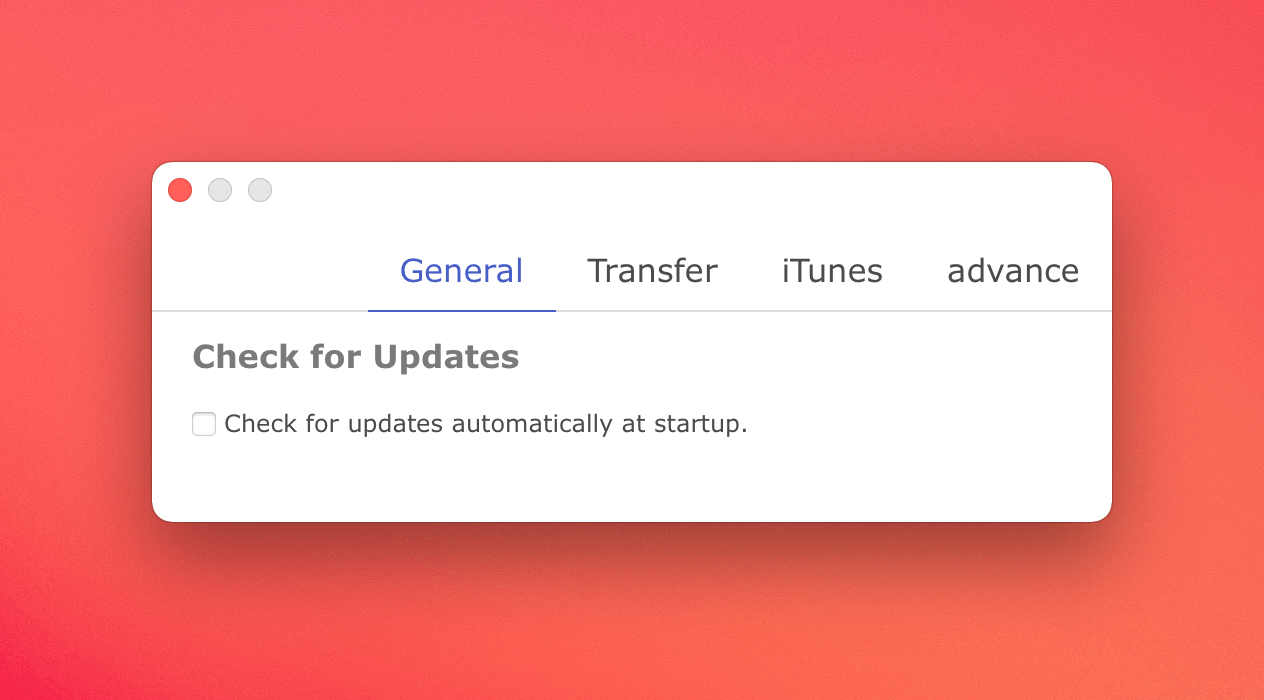
Options to allow check for updates when the application starts up
Transfer Options
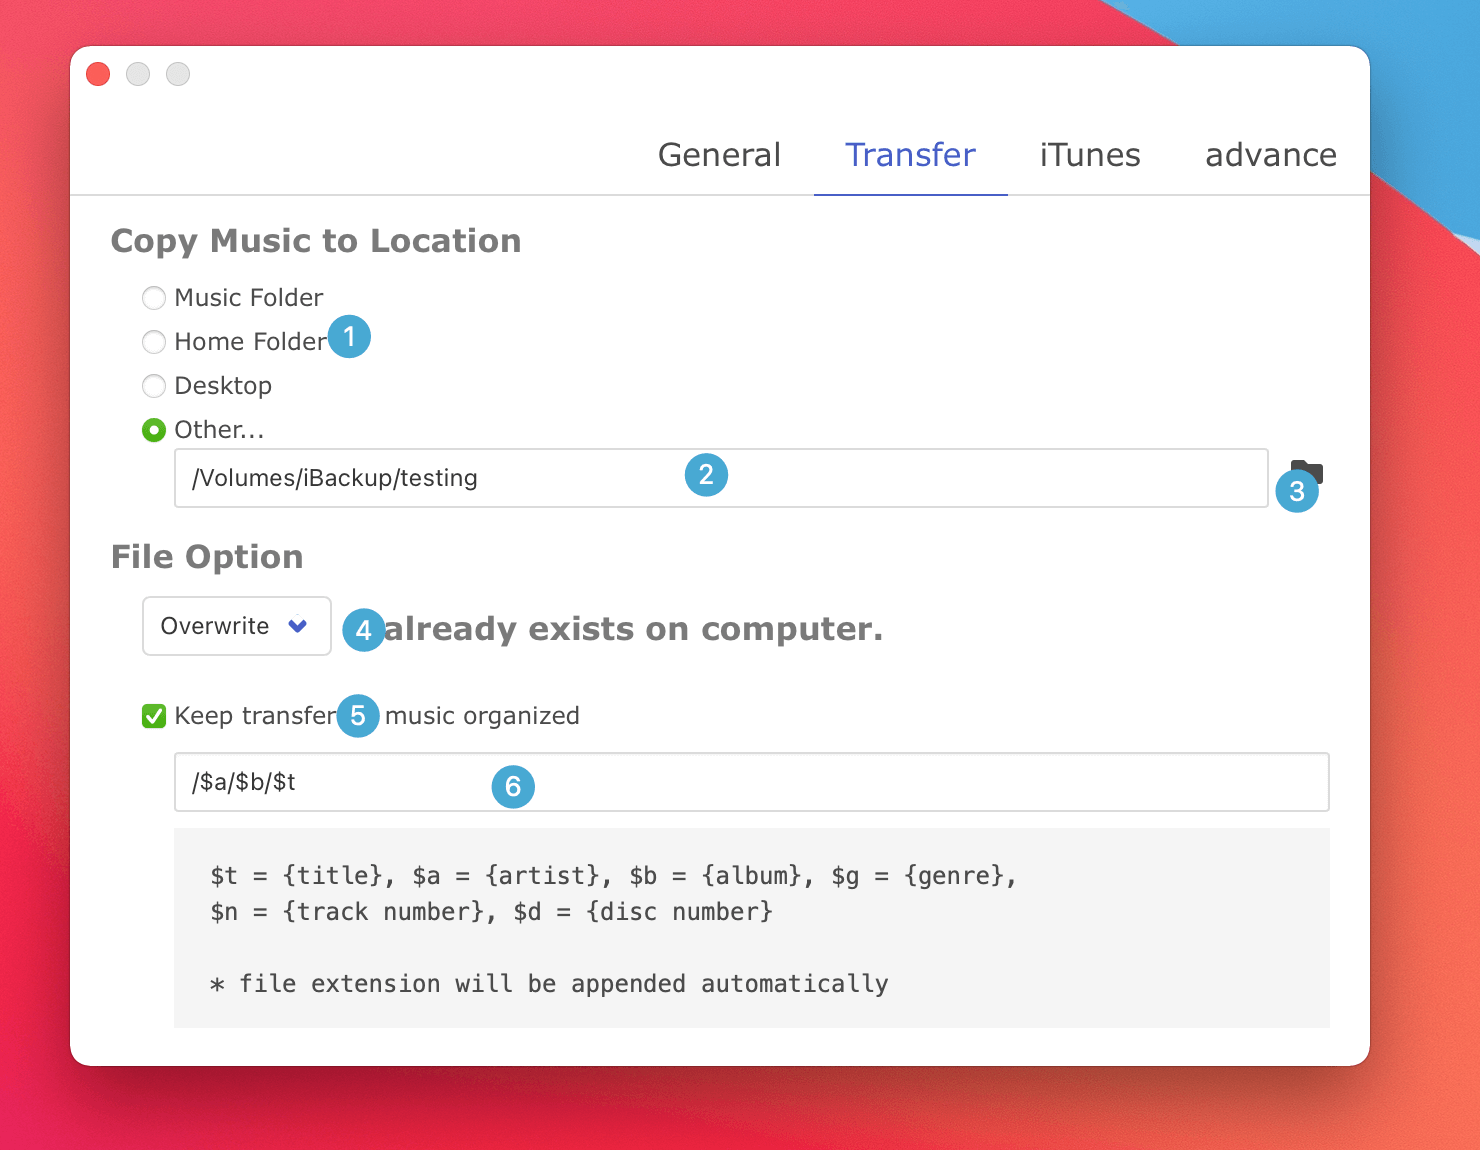
- Options for transfer:
- 1 Option to specify the location that the transferred music should be saved.
- 2 Custom location for the transferred tracks
- 3 Choose a folder on computer for custom location
- 4 Option to decide what to do if the file with same name already exists in the location
- 5 Transferred tracks will be named and organized by the pattern
- 6 Custom name pattern
Music Options
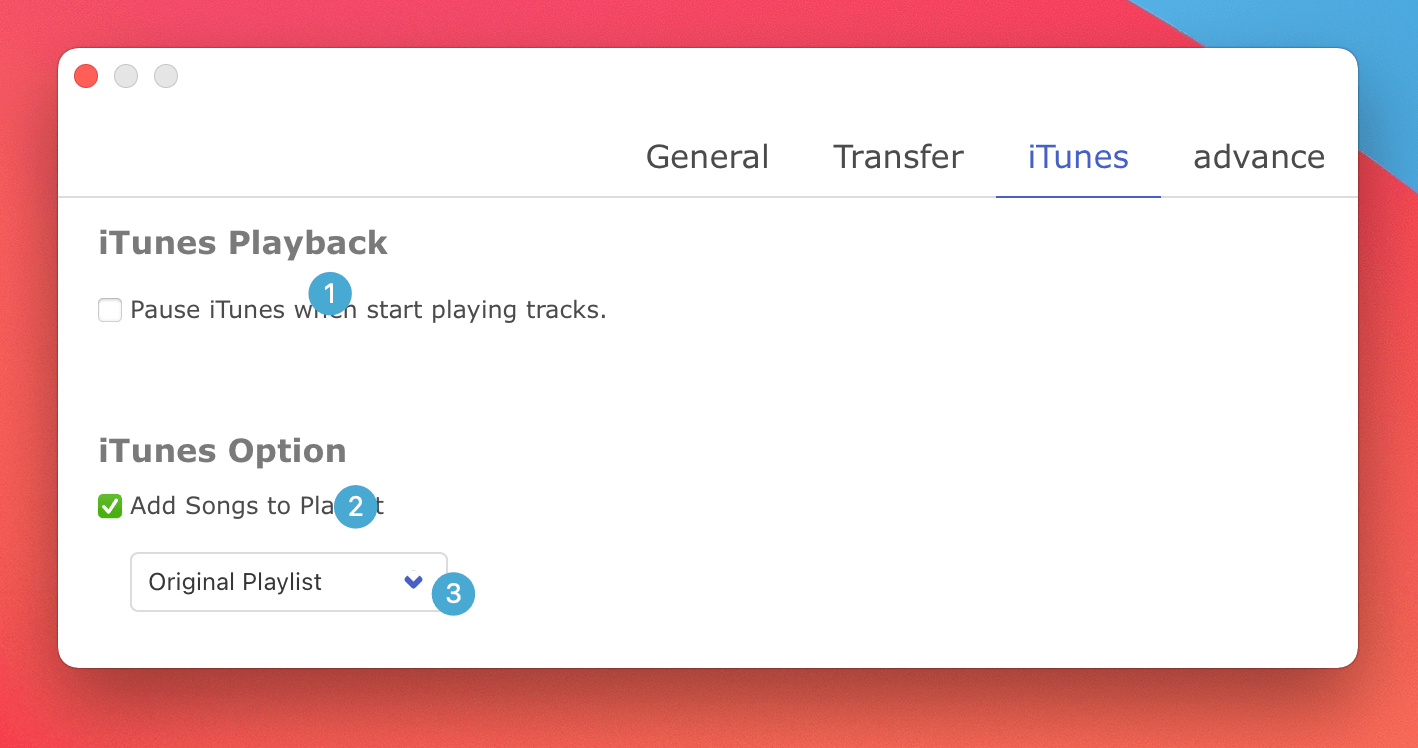
- Options for transferred music:
- 1 Stop Music.app or iTunes.app playing when play in iCopyAssistant
- 2 Add the transferred tracks to play list
3 Play list that the transferred tracks added to
- Original Playlist - Create the playlist of the track if it does not exist in local music library , and add the track to the playlist
- iCopyAssistant - the app will create this playlist and add the tracks to it
- Create New Playlist - specify custom playlist for the tracks.
Advance Options
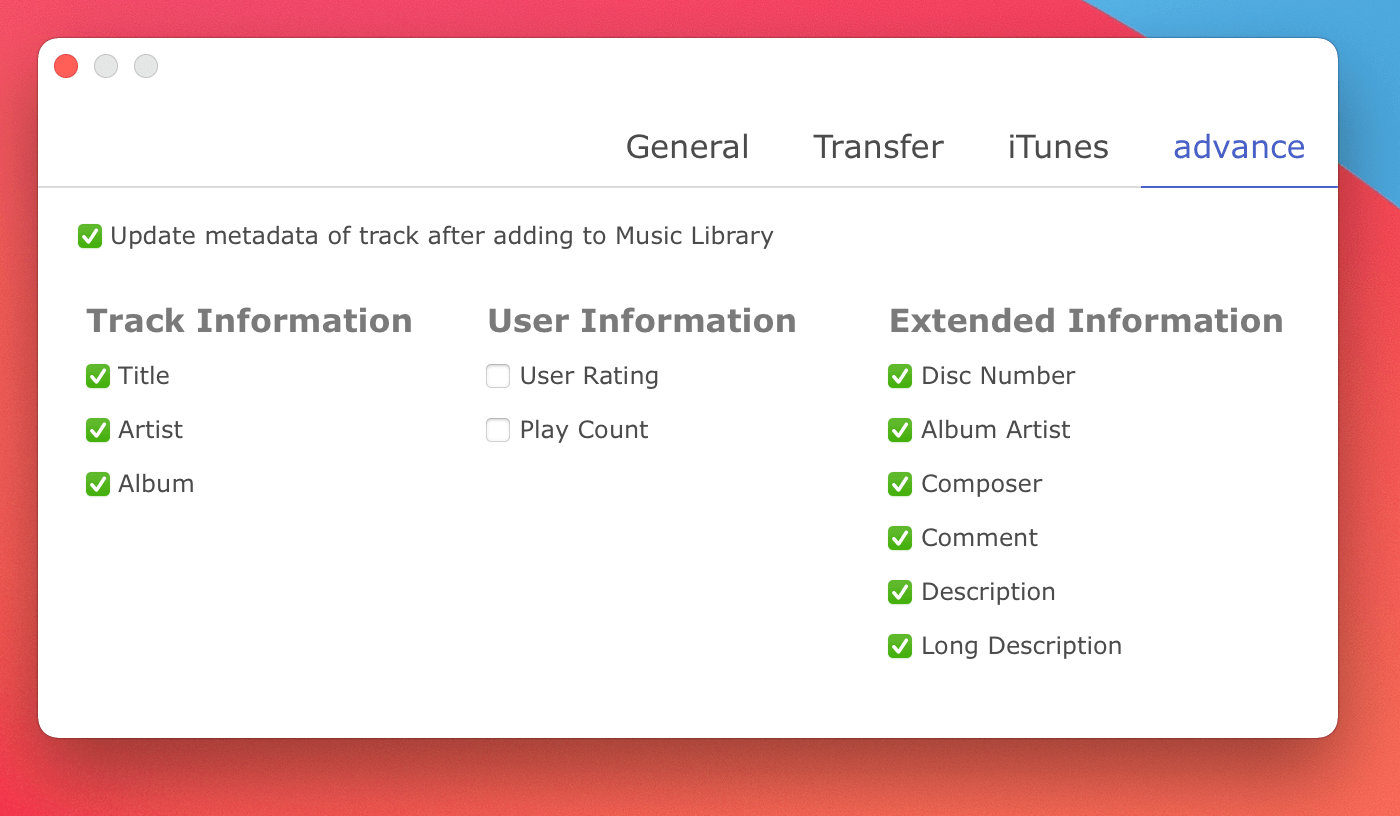
Updates the meta information of location music library according to those on the device.


